


 Today I’m going to share with you a notebook that I created to help keep all my notes together. This notebook is going to combine 3 notebooks into one. First, It will serve as a spot for me to check the status of my class (what book they are reading). Second, it will store anecdotal notes that I take (reading/math). Third, it will help me keep track of behavior notes that I send home.
Those 3 things are BIG. To have them in one notebook will keep me organized and save me time! Below are detailed pictures of how I put my Notes & Observations notebook together. Affiliate links to the products (or similar products) that I used are included.
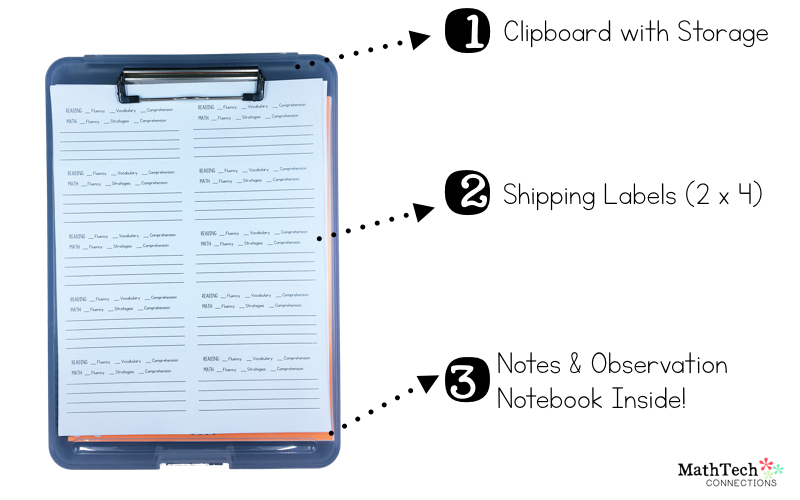
1 – I bought a clipboard with storage atTarget. The clip holds the labels (academic & behavior) and the inside holds my Notes & Observations Notebook.
2 – The labels are 2 x 4 shipping labels. Editable Word Documents are provided for you. There are 2 kinds. The first is for reading & math. These labels make it quick for you to jot down notes on what you notice students are struggling with. The second labels are for behavior (positive or negative). These labels will be put inside student agendas for parents to read & sign.
3 -I printed and bound my Notes & Observations Notebook. (more details below)
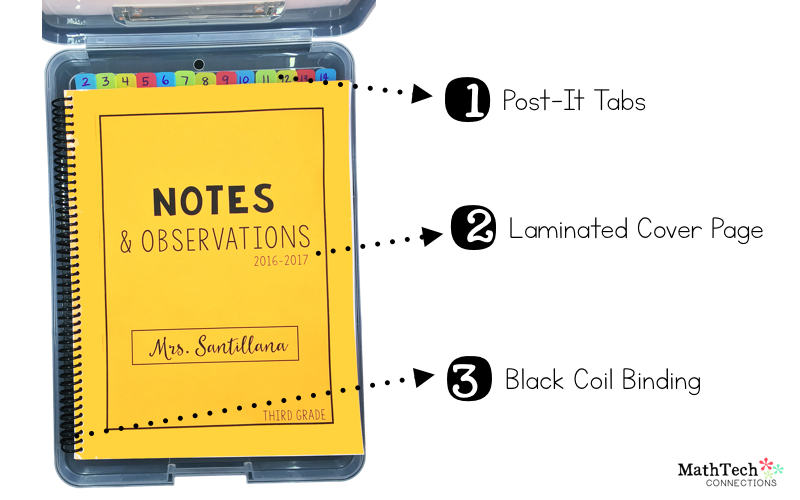
1 – I used sticky tabs to separate the notebook. They are numbered for each student to make it quick to find their pages.
2 – Make sure to laminate the cover for durability.
3 – Black coil binding was used to create the notebook.
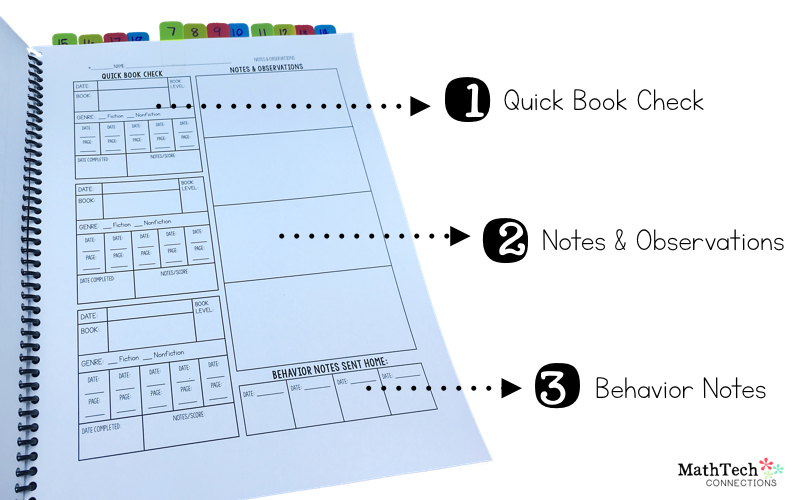
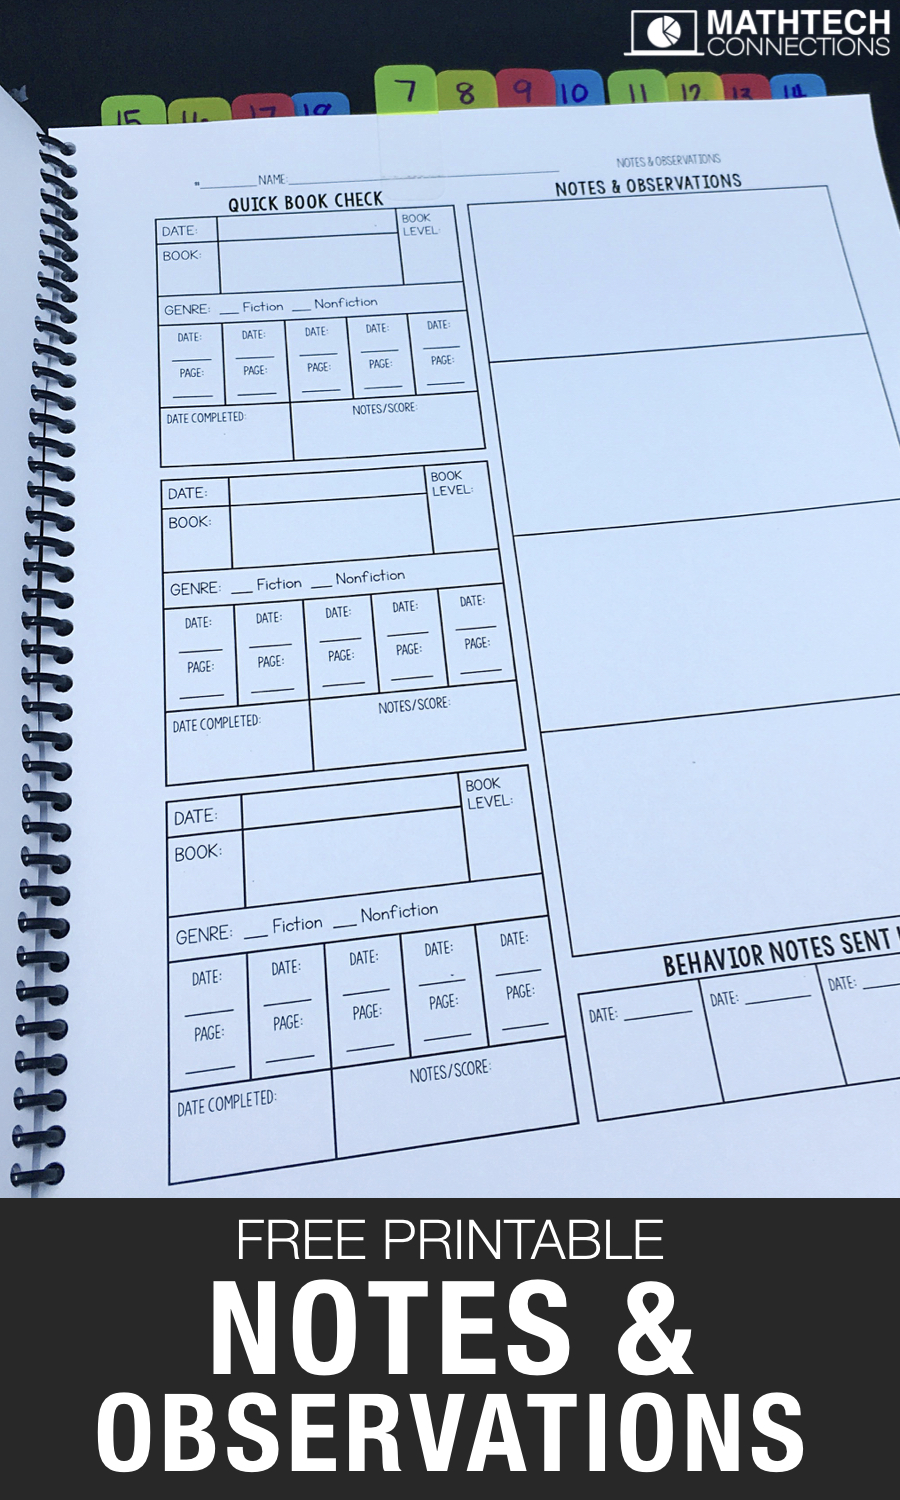
Here is a close look at the page that combines 3 notebooks into one!
1 – On the left side you will find a spot to write down what book each student it reading. There is a spot for the title, book level, book genre, spots to write down what page they are on, when they complete the book, and a spot for other notes.
2 – On the right side you will find 4 spots for the anecdotal notes (on the 2×4 shipping labels). When these 4 are full, I plan to place the rest of the notes on the back.
3 – The bottom corner has a spot for me to record when I send home a behavior note (on the 2×4 shipping label that was placed inside student agenda).
There you have it! The finished product looks so sharp! I know having everything in one spot will help me stay organized. 🙂


This is really cool! How many pages would you suggest we print for each student for the year?
These are amazing and saved me quite a bit of work. I even found the blue organizer on Amazon for a steal! Thanks so much for sharing your hard work and making mine that much easier.
You are AMAZING!!!! Thank you for freely sharing the things that you have created.